

How to clean vinyl flooring is a question many homeowners like Emily, a budget-conscious renovator, often ask. To keep vinyl floors looking beautiful and lasting for years, regular maintenance is key. Here’s a quick, simple routine to help you maintain your vinyl flooring:
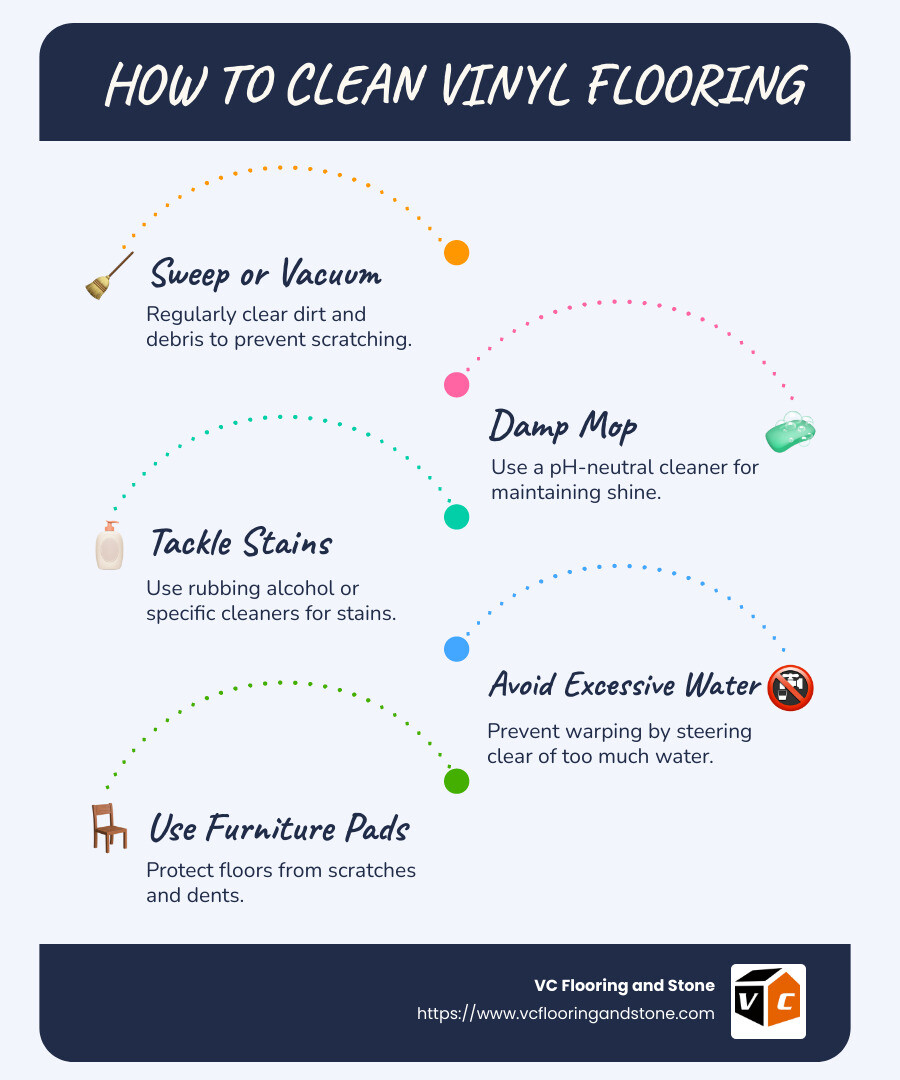
- Sweep or vacuum regularly to prevent dirt and debris from scratching the surface.
- Damp mop with a pH-neutral cleaner to maintain its shine.
- Tackle stains immediately with rubbing alcohol or specific cleaners to avoid long-term damage.
- Avoid using excessive water and steer clear of steam mops to prevent warping.
- Use furniture pads to protect against scratches and dents.
Vinyl flooring is celebrated for its durability and ease of maintenance, making it a popular choice for cost-conscious homeowners who want a touch of luxury without breaking the bank. By incorporating simple cleaning habits, you ensure that your vinyl flooring remains both functional and stylish, a robust choice for any room. Protecting your investment with regular upkeep will keep it gleaming and gorgeous, enhancing the elegance of your space.
Step 1: Prepare Your Floor
Before diving into the cleaning process, it’s crucial to prepare your vinyl floor properly. This step ensures that your cleaning efforts are effective and that the floor remains in top condition.
Remove Dirt and Debris
Start by removing loose dirt and debris. Use a soft-bristled broom or a dust mop to gently sweep the floor. This step helps prevent scratches that can occur when dirt is dragged across the surface during mopping.
- Tip: Begin in the corners of the room and work your way towards the center. This ensures you don’t miss any hidden dust bunnies.
Dry Mop
Once the larger debris is cleared, follow up with a dry mop. A microfiber mop is ideal because it attracts dust and dirt effectively without scratching the floor. This step is essential for picking up any fine particles left behind after sweeping.
- Pro Tip: If you have pets, a dry mop is excellent for collecting pet hair that tends to cling to the floor.
Vacuum for a Thorough Clean
For a more thorough clean, use a vacuum cleaner. Make sure to turn off the beater bar or rotating brush to avoid damaging the vinyl. Use the vacuum to clean along baseboards and under furniture, where dust tends to accumulate.
- Reminder: When vacuuming vinyl planks, pay special attention to the gaps or cracks between the pieces to ensure all debris is removed.
By following these steps, you lay the groundwork for a successful cleaning routine. Removing dirt and debris not only protects the floor from scratches but also improves the effectiveness of the cleaning solution you’ll use next.
Step 2: Choose the Right Cleaning Solution
Now that you’ve prepped your vinyl floor, it’s time to pick the perfect cleaning solution. The right choice ensures your floor stays clean and shiny without damage.
Vinegar and Water
A simple and effective solution for how to clean vinyl flooring is a mixture of vinegar and water. Use one cup of apple cider vinegar or white vinegar mixed with a gallon of warm water. This solution is gentle yet effective at lifting dirt and grime.
- Why Vinegar? It’s a natural cleaner that disinfects and leaves no residue. Plus, it’s budget-friendly and safe for pets and kids.
pH-Neutral Cleaner
If you prefer a commercial option, go for a pH-neutral cleaner specifically designed for vinyl floors. These cleaners are formulated to clean without harming the floor’s finish. Always check the label to ensure it’s safe for vinyl.
- Tip: Follow the manufacturer’s instructions for mixing and applying the cleaner. Using too much can lead to residue buildup.
Avoid Ammonia and Bleach
Steer clear of harsh chemicals like ammonia and bleach. These can damage your vinyl floor, causing it to become dull or discolored over time.
- Warning: Ammonia and bleach can cause cracks or scratches. They might also leave a dull film on your beautiful vinyl.
By choosing the right cleaning solution, you protect your vinyl floor and keep it looking great. Next, we’ll dive into the best way to mop your floor for a streak-free shine.
Step 3: Mop the Floor
Once you’ve chosen the right cleaning solution, it’s time to start mopping. This step is crucial for keeping your vinyl floors looking their best. Here’s how to do it effectively:
Use a Microfiber Mop
A microfiber mop is your best friend when it comes to cleaning vinyl floors. It’s gentle yet effective, picking up dirt and grime without scratching the surface.
- Why Microfiber? Microfiber mops are soft and absorbent, making them ideal for vinyl. They trap dirt and dust, leaving your floor spotless.
Keep the Mop Damp, Not Wet
One of the key tricks to mopping vinyl floors is to keep your mop damp, not soaking wet. Vinyl flooring is not a fan of excessive water, which can lead to warping or bubbling.
- How to Dampen: Dip your microfiber mop into your chosen cleaning solution, then wring it out thoroughly. The mop should be damp enough to clean but not dripping.
Mop in the Direction of the Plank’s Grain
When mopping, always follow the direction of the plank’s grain. This technique helps to avoid streaks and ensures an even clean.
- Tip: Rinse your mop head frequently in clean water to prevent spreading dirt around.
Avoid Excessive Water
Excessive water is the enemy of vinyl flooring. It can seep into the seams and cause damage over time. Be mindful of the amount of liquid you use while mopping.
- Warning: Standing water can lead to warping, bubbling, or even mold growth under your vinyl floor.
By using the right mop and techniques, you can keep your vinyl floors clean and beautiful. Next, we’ll tackle removing stains and scratches to maintain that pristine look.
Step 4: Remove Stains and Scratches
Vinyl floors are known for their durability, but stains and scratches can still happen. Here’s how to handle them effectively.
Baking Soda Paste for Stains
Baking soda is a natural powerhouse for removing stains from vinyl floors. It lifts dirt without harming the finish.
- Make the Paste: Mix baking soda with water to create a thick paste.
- Apply and Rub: Use a soft rag to apply the paste to the stain. Rub gently until the stain lifts.
- Repeat if Needed: Some tough stains may need more than one application.
- Clean Up: Wipe away excess paste with a damp cloth.
Tip: For extra cleaning power, rinse with a vinegar and water mix. The reaction with baking soda can help lift stubborn stains.
Rubbing Alcohol for Scuffs
Scuffs can be unsightly, but rubbing alcohol can help.
- Buff Out Scuffs: Dab a little rubbing alcohol on a rag and gently buff the scuff until it disappears.
Note: Always test in a hidden area first to ensure no discoloration.
Commercial Repair Kits for Scratches
For deeper scratches, commercial repair kits can be a lifesaver. These kits often include:
- Floor-Safe Polish: Products like Bona’s Hard-Surface Polish can fill in micro-scratches and protect against future wear.
- Vinyl Repair Kits: These can be used for more severe damage, providing a more permanent fix.
Advice: Follow the manufacturer’s instructions for best results and always check if the repair kit is suitable for your specific type of vinyl flooring.
By using these methods, you can keep your vinyl floors looking like new. Whether you’re tackling stains or scratches, these simple solutions can make a big difference. Next, we’ll move on to drying and buffing your floor for that perfect finish.
Step 5: Dry and Buff the Floor
After cleaning your vinyl floors, the final step is to dry and buff them to perfection. This step not only prevents water spots but also adds a beautiful shine to your floors.
Use a Microfiber Cloth
A microfiber cloth is your best friend when it comes to drying vinyl floors. These cloths are soft, absorbent, and won’t scratch the surface.
- Dry the Floor: After mopping, use a clean, dry microfiber cloth to wipe the floor. Start at one corner and work your way across the room. This helps to soak up any leftover moisture, preventing water spots that can dull the floor’s appearance.
- Pay Attention to Edges: Make sure to dry along the edges and corners, as water tends to accumulate there. This helps to prevent warping or bubbling over time.
Buff for a Shine
Once the floor is dry, it’s time to buff it for that extra shine. Buffing not only improves the floor’s appearance but also helps maintain its protective layer.
- Buff with a Microfiber Cloth: Using a fresh microfiber cloth, gently buff the floor in a circular motion. This will add a natural shine without the need for waxes or polishes, which can build up and make the floor look dull.
- Consistency is Key: Regular buffing can keep your vinyl floor looking shiny and new. It’s a simple step that makes a significant difference in maintaining the floor’s beauty.
By following these steps, you’ll ensure your vinyl floors are not only clean but also stunningly shiny. The key is to dry thoroughly and buff regularly to keep your floors looking their best.
Next, we’ll tackle some frequently asked questions about cleaning vinyl flooring to clear up any lingering doubts.
Frequently Asked Questions about Cleaning Vinyl Flooring
What is the best cleaner for vinyl floors?
When it comes to cleaning vinyl floors, vinegar and a pH-neutral cleaner are your go-to solutions. Vinegar, when mixed with water, creates a safe and effective cleaner that removes dirt without harming the floor. Simply mix equal parts of vinegar and water, and add a few drops of dish soap for an extra cleaning boost.
For those who prefer commercial options, a pH-neutral cleaner is ideal. These cleaners are specially formulated to be gentle on vinyl while effectively removing grime. Always check that the cleaner is labeled safe for vinyl to avoid any damage.
Can you use a steam mop on vinyl floors?
Avoid using steam mops on vinyl floors. The high heat and moisture from steam mops can seep into the seams and cause water damage, such as warping or bubbling. Vinyl floors are designed to withstand some moisture, but excessive water can compromise the integrity of the floor. Stick to a damp mop with a microfiber head for safe and effective cleaning.
How often should you clean vinyl floors?
The frequency of cleaning your vinyl floors depends on the traffic they receive. In high-traffic areas, like kitchens or entryways, aim for a weekly cleaning routine. Regular sweeping or vacuuming helps to remove dirt and debris that can scratch the floor. For less busy areas, a bi-weekly cleaning schedule might suffice. Consistent maintenance keeps your floors looking great and extends their lifespan.
At VC Flooring and Stone, we believe that luxury flooring doesn’t have to come with a hefty price tag. Our commitment is to offer you high-quality, affordable vinyl flooring options that are both stylish and practical. Our 9mm SPC vinyl flooring is not only waterproof and scratch-resistant but also designed to withstand the wear and tear of everyday life.
Whether you’re a first-time homeowner or looking to upgrade your current space, our vinyl flooring is an excellent choice. It combines the elegance of luxury flooring with the durability needed for busy households. Plus, with our tips on how to clean vinyl flooring, maintaining its beauty is simple and hassle-free.
Located in the heart of Honolulu, HI, we are more than just a flooring provider. We work with licensed professionals to ensure your renovations are completed to the highest standards. Our showrooms are open six days a week, so visit us and explore our range of flooring options.
Ready to transform your home with luxury vinyl flooring? Explore our collection and find how VC Flooring and Stone can help you achieve the perfect balance of style, durability, and affordability.